Mapping out evictions as a process can help leaders & residents understand their local eviction system. This process map can coordinate service-providers, build legal capability, and flag where improvements are needed.
How to Process Map
Step 1: Decide on Mapping Stakeholders
Who knows how evictions & emergency rent assistance play out in your region? These are the stakeholders you want to invite to your mapping workshop.
You may speak to them all at the same time, or do consecutive mapping sessions with them. Think about having less than 20 people on a single call. If you have more than that amount of stakeholders, you can have a series of mapping events.
Step 2: Set Up the Map
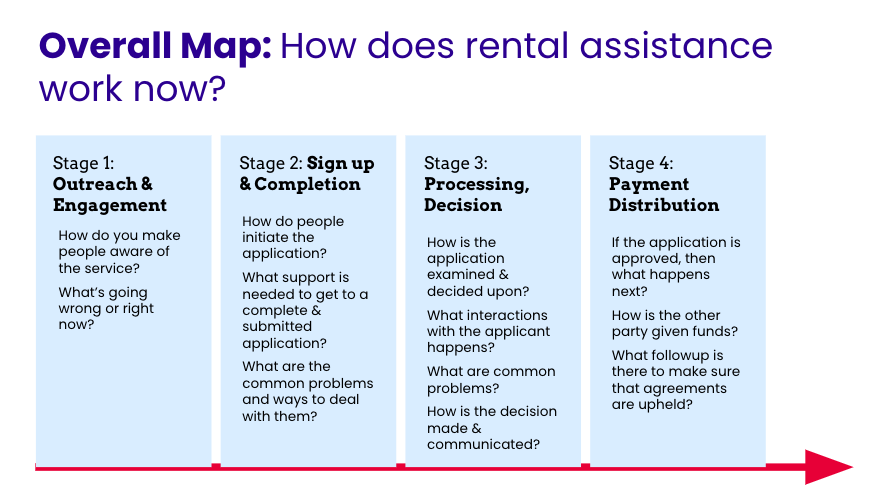
Before you can get started with making the map, first you need to prepare the map’s setup. What will it look like? What are the main sections to fill out during the event?
This includes deciding what the map’s size & format will be. It also includes laying out the categories, titles, and organization.
For our past Eviction & Rental Assistance Mapping sessions, we have used categories like:
- Before a Problem Arises
- As the Problem Begins
- Outreach to Services
- Application and Processing to Get Assistance
- Possible Resolution through Services
- Problem Escalates to Court
- Moving Forward
These categories then cover different situations. It will cover the golden path, when the parties can find services, get help, and go back to a healthy landlord-tenant relationship.
It will also describe situations when people miss rental assistance and the problem get worse, going through court and possible eviction. Or when they apply, but then have lots of detours: missed deadlines, unresponsive parties, or denial.
The other layer of categories are the swimlanes. These are not about the timeline phases, but rather the different categories of stakeholders involved in the system at that phase.
Step 3: Mapping Event
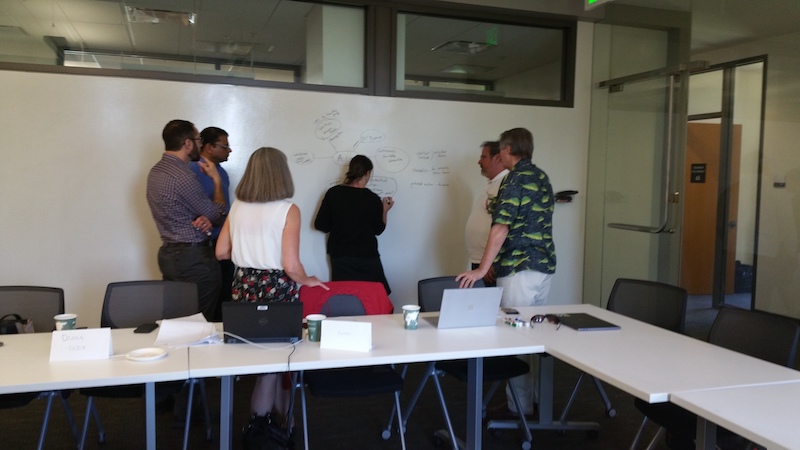
Invite your stakeholders to a mapping event. It should be at least 45 minutes, and up to 90 minutes. Less than that, and it will be hard to get into all the details. More than that, and the energy might flag.
Make a facilitation plan. Have a team of at least 3 people: one to ask questions, a second to take detailed notes on post-its, and a third to watch participants and add in more.
That first person should be the lead interviewer, asking all to put down the steps and to go into detail about the process.
- What happens next?
- Tell me more. What exactly happens?
- What if that goes wrong? Then what would you do?
Ideally, everyone will be working on the same map, and take turns contributing details as it turns to their areas, where they know the details. If no one can answer the questions the facilitator is asking (, then you make note that you need to reach out to people later, who can add in these details.
Step 4: Clean Up the Map
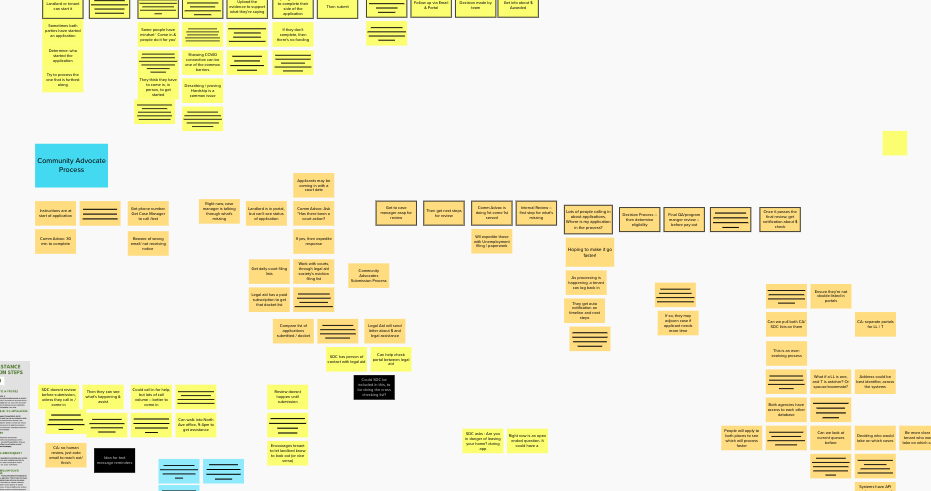
At the end of the mapping session, you should have a giant but unwieldy map. It will be full of details, clumps of overlapping post-its, and some fuzzy spots of places where you need to get more details added in.
Your facilitation team should now preserve this original map, but make a duplicate that you can then streamline, reformat, and make versions of.
Send up this streamlined, clean version of the whole map to all the participants from your event. This is theirs as a contributor, so they can see the end product of the work that they contributed. You can share it as a png or pdf file. You might also screenshot sections of it, and lay it out in a series of slides in a deck.
Step 5: Customize Maps for Specific Uses
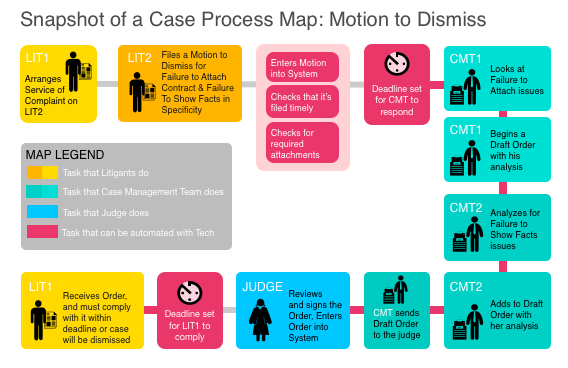
The full system map is too detailed for many of your possible users. It will have too much content to be helpful to them. Your team can simplify them, for specific kinds of use cases.
Some possible map versions might be:
- A Tenant or Landlord Guide: This ultra-simple map could be on the webpage, on flyers handed out by courts or social services, or anywhere else that residents might be seeking out assistance for their problems.
- A Service-Provder Training Deck:
Making the Map Useful to Stakeholders
What can you do with the map once it’s been created?
- Service Changes Agenda-Setting. Hold a meeting after you’ve done the maps, to prioritize changes that may need to be made, based on the service map. Use the map as a tool to understand in detail what is happening with your service provision, and what is happening from our user experience
- Go through the red flags for where there needs to be improvements in efficiency, experience, or standardization. Rank them and list them out in your ongoing agenda: how can you tackle these red flags?
- Coordinate your Providers. The map can help groups who are doing parallel versions of the process, understand each other’s best practices and red flags, so they can coordinate better and make the strongest process possible
- Send the Map to Related Providers. Who else in your community works in an area related to eviction prevention? The map (in a simplified form) can help groups who work on different parts of the process understand what happens from a more holistic perspective. You can send the process map to them, so they can refer to it digitally, as a printout, or on the wall so that they can share how eviction works with their colleagues and clients.
- Train new Staff Members. Use the map (in a single image, or a staged slide deck) to train new staff members and outside stakeholders, so that they become literate in the system, that they are able to do more effective outreach, and that they understand the process inside and out so that they are more effective in their work.
- Empower your Residents. Landlords and tenants can
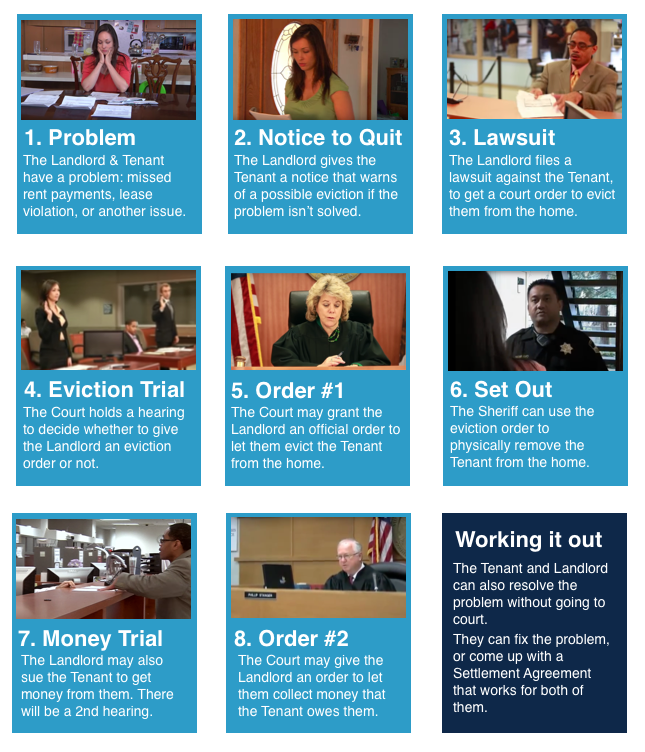
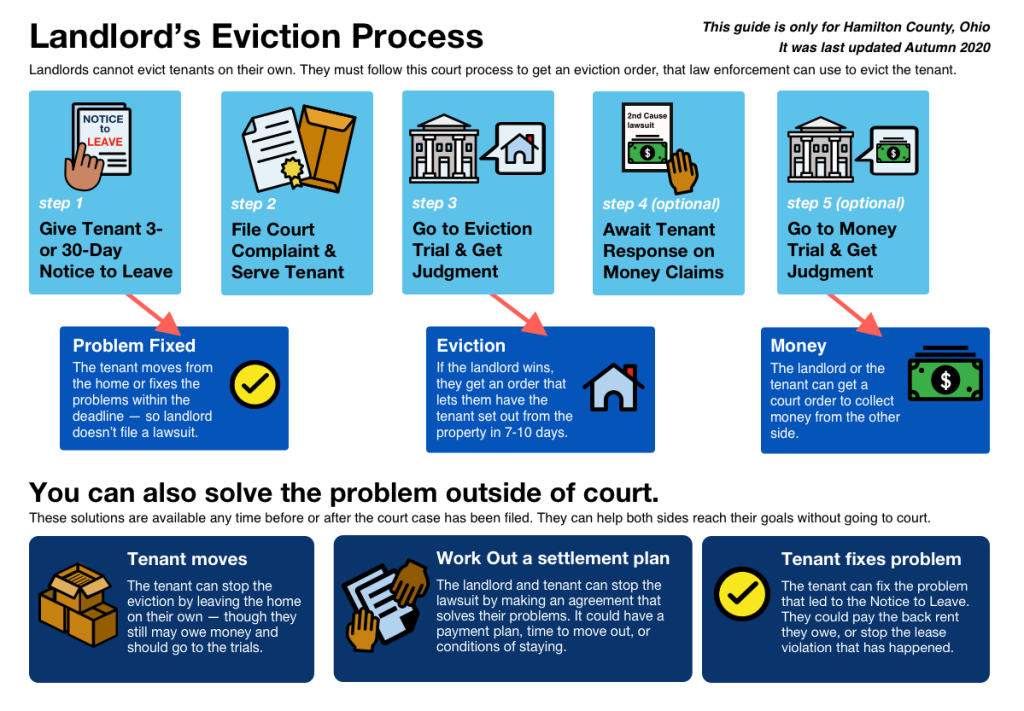
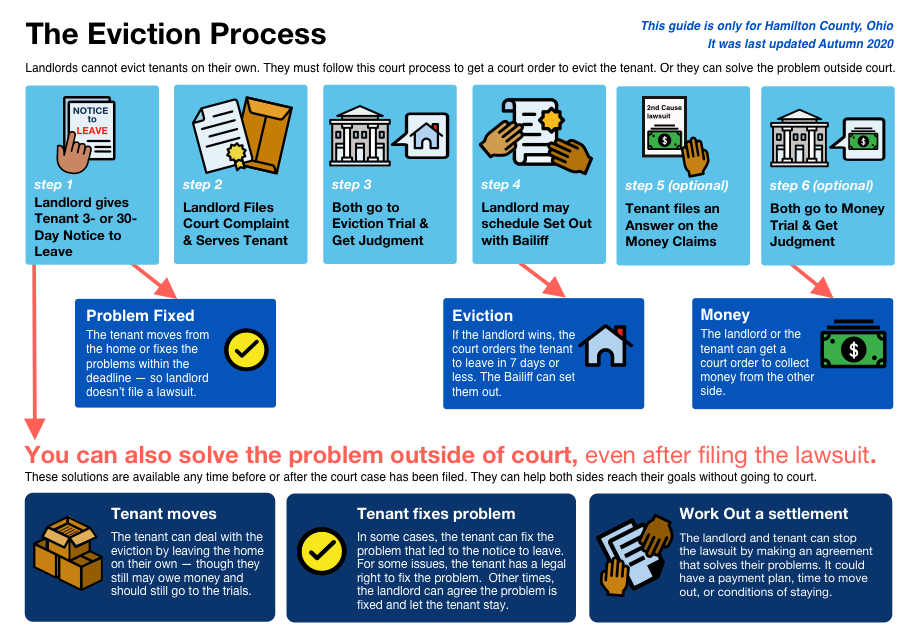
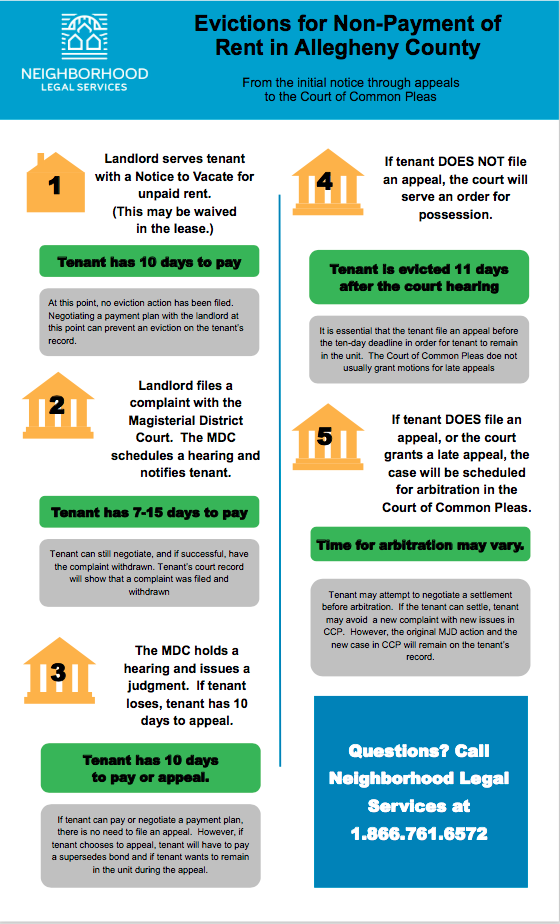
Examples of Eviction Process Maps
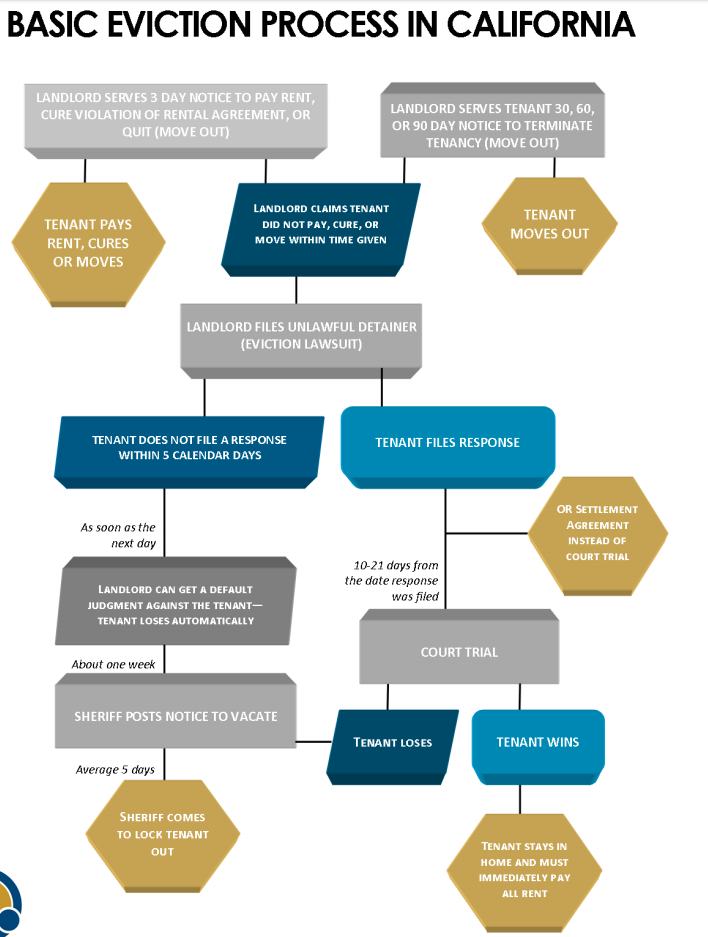
Learn More about mapping
Service mapping: a step by step guide is a practitioner-focused blog from the UK government, that works on how mapping can be used in public services.
Co-Creating System Maps is a guide to run a workshop on how a system works, from the This is Service Design Doing group.
